1:Check the oil circuit to see if the oil drain pipe is not connected to the oil tank.
Check the mold closing proximity switch.
2:Check whether the mold clamping oil pressure can normally establish a pressure of 12MPa. If the pressure is abnormal, there is a problem with the parameter setting, and the pressure of 500-999 needs to be readjusted.
4:If the pressure continues to drop after the clamping time or the mold cavity pressure drops by more than 1.5MPa within 1 minute, this is also considered mold expansion.
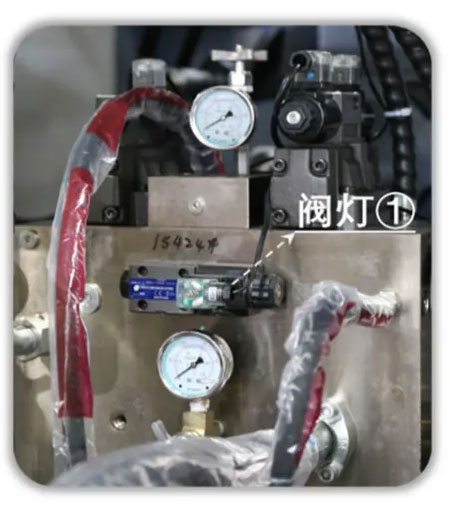
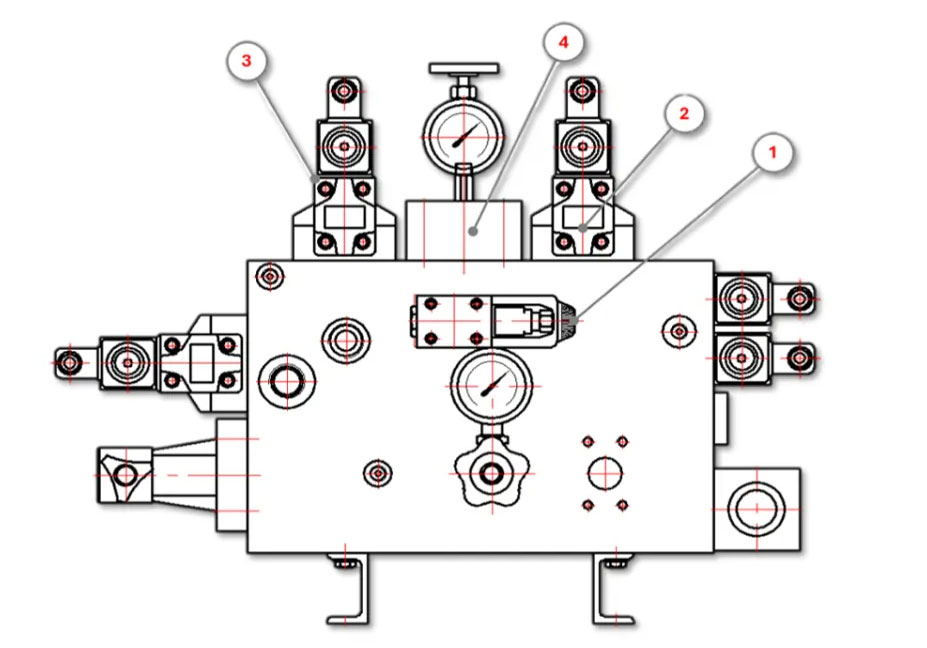
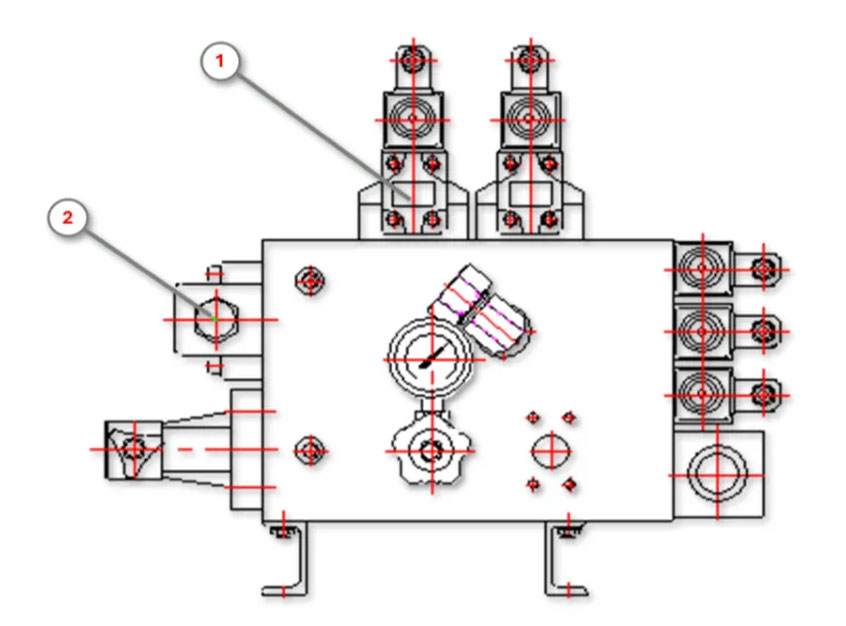
6:Replace ②③ hydraulic valves one by one to eliminate the quality problem of the hydraulic valve itself
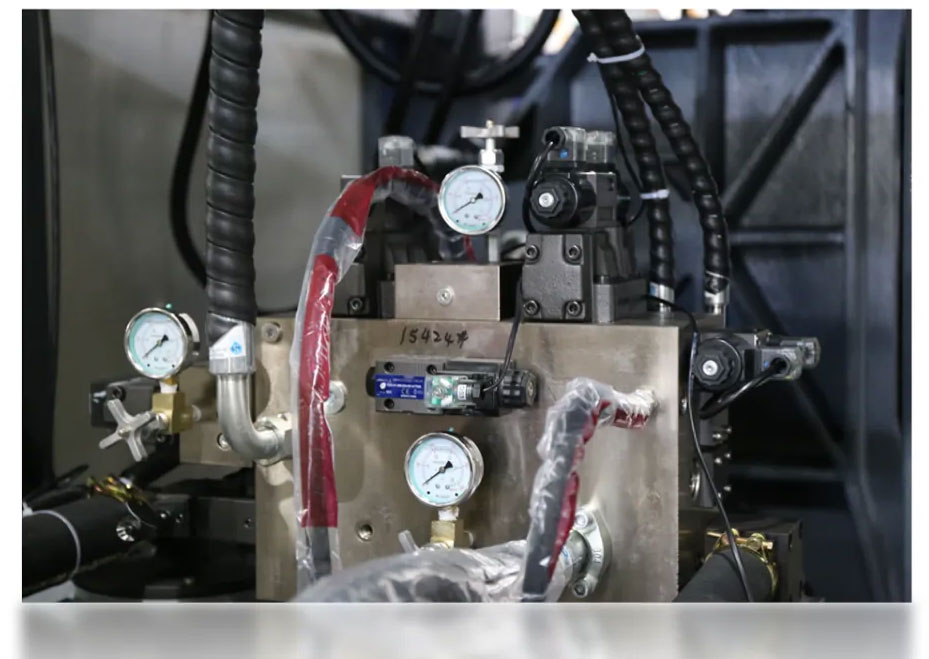
7:Check for problems with components under the cover
Remove the cover plate and the entire set of plug-ins under the cover plate, and check the state of the sealing ring to see if there is any defect, crack or damage.
Check whether there is any burr or scratch on the processing surface of the valve plate plug-in installation hole. If there is any damage, it needs to be replaced in time.
8:Check the cylinder
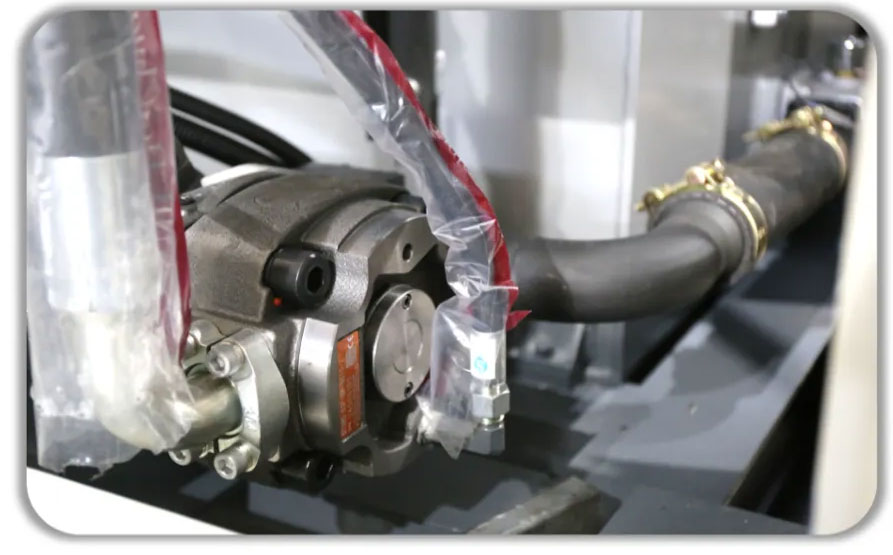
If no abnormality is found in the above inspection, a set of high-pressure ball valve and pressure gauge should be connected in series between the clamping pipe of the rear end cover of the clamping cylinder (the pressure gauge should be located before the cylinder and the ball valve). Manually close the high-pressure ball valve from the start to the end of the tightening process and observe the pressure gauge value. If the pressure drops, it means that there is leakage in the cylinder and the cylinder needs to be checked and replaced.
a) Refer to the above steps 1-3 to check and replace the mold closing valve in the right figure ①,
verify the valve status.
b) If the mold expansion phenomenon is not eliminated, consider checking the installation of the plate-type hydraulic control one-way valve ② and consider replacing it, and verify the valve status.
c) Finally, perform the above step 8 to check the cylinder status.
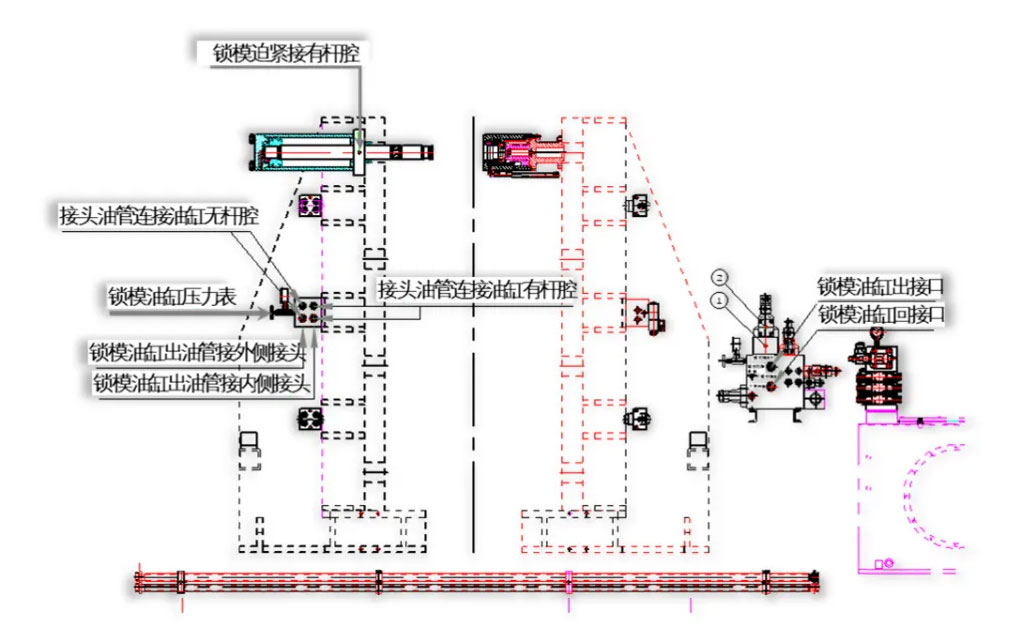
1:Check the oil circuit
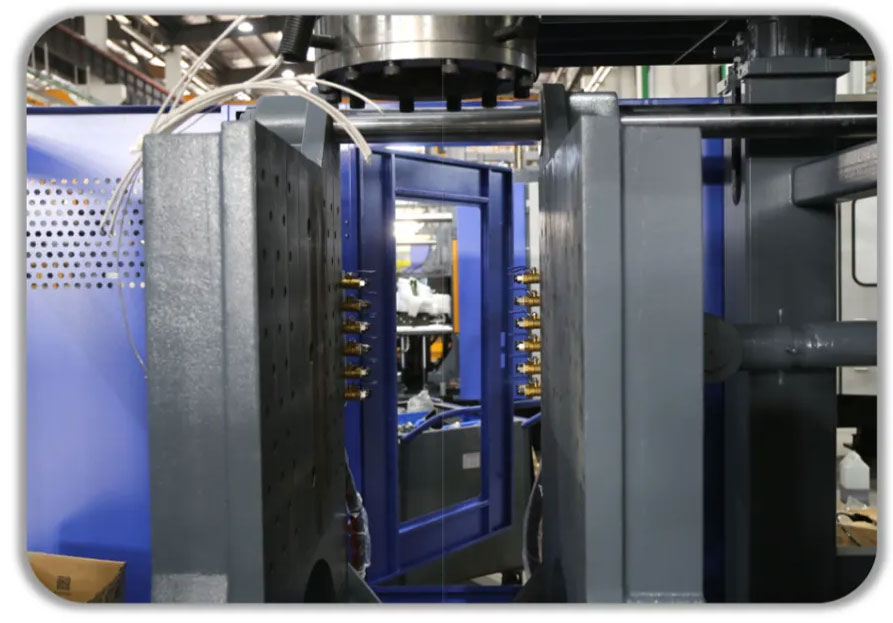
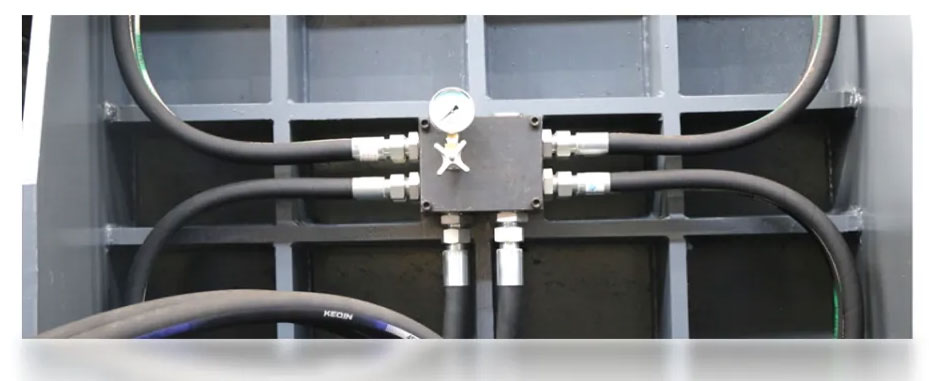
The clamping oil circuit is connected to the steel pipe from the return interface of the clamping oil cylinder of the main valve plate, and then transported to the bottom of the oil distributor block of the front template, and connected to the inner joint of the oil distributor block according to the diagram. At this point, the clamping oil circuit is divided into four parts and finally connected to the rod chamber of the clamping oil cylinder.
The secondary oil circuit is unique and cannot be connected incorrectly as shown in the figure.
2:Check system oil pressure
Check whether the system oil pressure can normally establish the 12MPa test pressure. If the pressure is abnormal, there is a problem with the parameter setting, and the pressure corresponding to 500-999 needs to be readjusted.
3: After checking that the oil circuit and pressure are correct according to the diagram
Observe the clamping cylinder pressure gauge on the front template. If the pressure gauge value drops during the pressure holding stage after the clamping is completed, it means that the clamping system has failed.
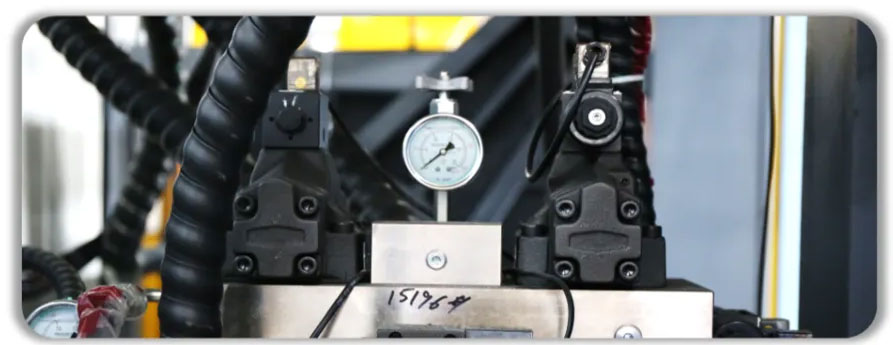
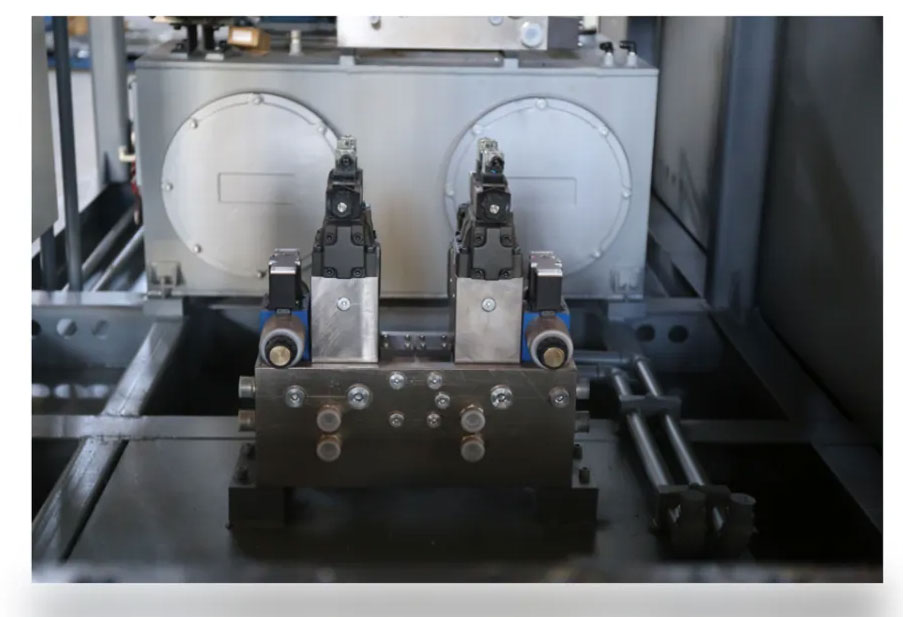
Further check the hydraulic valves ①②, models MPB-06-4, DG5V-8-6C-T, DG4V-3-6C, and ensure correct installation.
If there is no error in the inspection, replace ①MPB-06-4 superimposed hydraulic control check valve, confirm the status of the check valve, and solve the mold expansion, indicating that the check valve has failed.
If the mold expansion is not improved, replace ②DG5V-8-6C-T, DG4V-3-6C hydraulic reversing valve, and check the status of the reversing valve.
If it has not been improved, a high-pressure ball valve needs to be connected in series at the return oil pipe of the mold locking cylinder of the main valve plate. After the mold locking cylinder returns to its position for tightening, close the high-pressure ball valve before the tightening is completed, and observe whether the pressure holding pressure on the mold locking pressure gauge on the front template oil separator block is relieved. If it is relieved, it means that the pressure relief occurs from the oil separator block to the cylinder section, so replace the oil separator block first.
Verify whether the oil separator block defect cracks relieve pressure. If the status is not relieved, it means that there is an internal leakage and pressure loss in the mold locking cylinder. At this time, find the internal leakage cylinder and replace it.
4: If the clamping oil circuit maintains pressure normally, it is necessary to check whether the valve plate has defects such as sand holes and air holes that cause pressure leakage.